

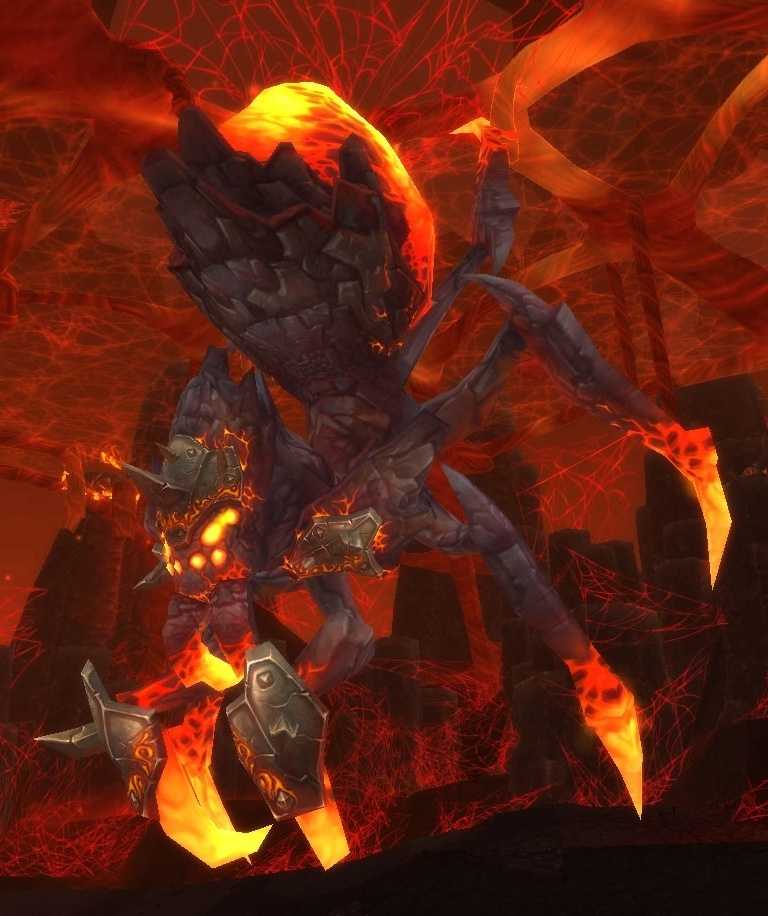
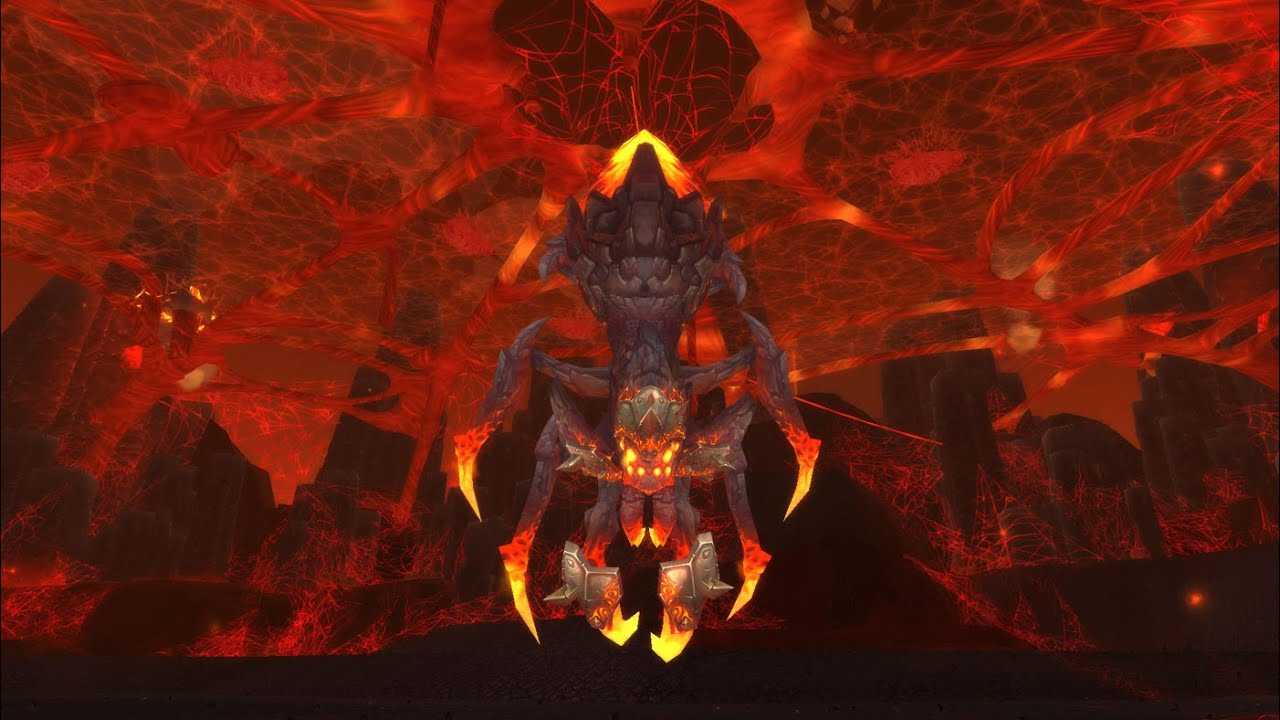
Способности[]
Бой состоит из двух фаз: в первой фазе вашему рейду предстоит разбираться с многочисленными аддами, во второй — непосредственно с Бет’тилак.
- Способности первой фазы
Огненная энергия: Бет’тилак постепенно теряет огненную энергию. Также энергию из нее высасывают пеплопряды-трутни, если их собственный запас иссякает. Когда иссякает запас энергии самой Бет’тилак, она воспламеняется, вызывая тлеющее разрушение.
Тлеющее разрушение — Когда у Бет’тилак заканчивается огненная энергия, она поджигает себя, нанося всем игрокам, находящимся на одном с нею уровне, 380000-420000 ед. урона от огня.
Когда энергия у босса иссякает — она начинает использовать этот 8-секундный каст. Все кто не успел спрыгнуть с паутины — умрут.
Горящий метеор — Метеоры падают на паутину, нанося игрокам в радиусе 7 м от места падения 37000 — 43000 ед. урона от огня. Кроме того, они прожигают в паутине дыру, сквозь которую игроки могут провалиться. Игроки наверху паутины должны следить за метеорами. Дырки от метеоров нужно использовать чтобы убегать от Тлеющего разрушения.
Раздуть угли — Наносит 18500 — 21500 ед. урона от огня всем противникам. Если наверху никого нет, то босс начинает поливать рейд огнем. На 2-й фазе эта способность применяется постоянно.
- Способности второй фазы
Бешенство — Время от времени Бет’тилак произносит заклинание «Бешенство», до конца боя увеличивающее наносимый ею урон на 5%. Эффект суммируется.
Поцелуй вдовы — Кровь текущей цели Бет’тилак вскипает от ее смертельного поцелуя, так что эффективность получаемого целью исцеления снижается на 10% каждые 2 сек. в течение 20 секунд. Кроме того, после поцелуя жертва наносит своим союзникам в радиусе 10м увеличивающийся урон от огня.
Способности Пеплопрядов-ткачей
Пауки среднего размера.
Эти адды спускаются сверху по паутине. Использование таунта (или аналогичной способности у других танков) заставляет их спуститься на землю. После их смерти остается нить паутины, по которой игрок может забраться наверх к боссу.
Кипящая кислота — Плюет в случайного противника кипящей кислотой, наносящей 18850 — 21150 ед. урона от огня.
Способности Пеплопрядов-трутней
Большие пауки.
Огненная энергия — Когда у трутней заканчивается огненная энергия, они взбираются к Бет’тилак и начинают выкачивать огненную энергию из нее.
Кипящая кислота — Плюет в случайного противника кипящей кислотой, наносящей 18850 — 21150 ед. урона от огня.
Кипящие брызги — Пеплопряд-трутень плюет в противников, находящихся в секторе углом 60 градусов и радиусом 20 м, горящим ядом, нанося им ~60000 ед. урона от огня.
Способности Паучат-пеплопрядов
Маленькие паучки.
Паучки опасны тем что босс и другие адды могут их поедать, восстанавливая себе ХП (босс отлечивается на 10% ХП, адды — на 20% и баффаются на 20% скорости передвижения и наносимого урона). Изначально они всегда идут к трутням.
Сочащийся яд — Паучонок-пеплопряд прыгает на одного из персонажей в радиусе 7 м, отравляя его ядом и нанося 6937 — 8062 ед. урона от огня раз в 2 сек. в течение 10 секунд.
Тактика[]
1-я фаза
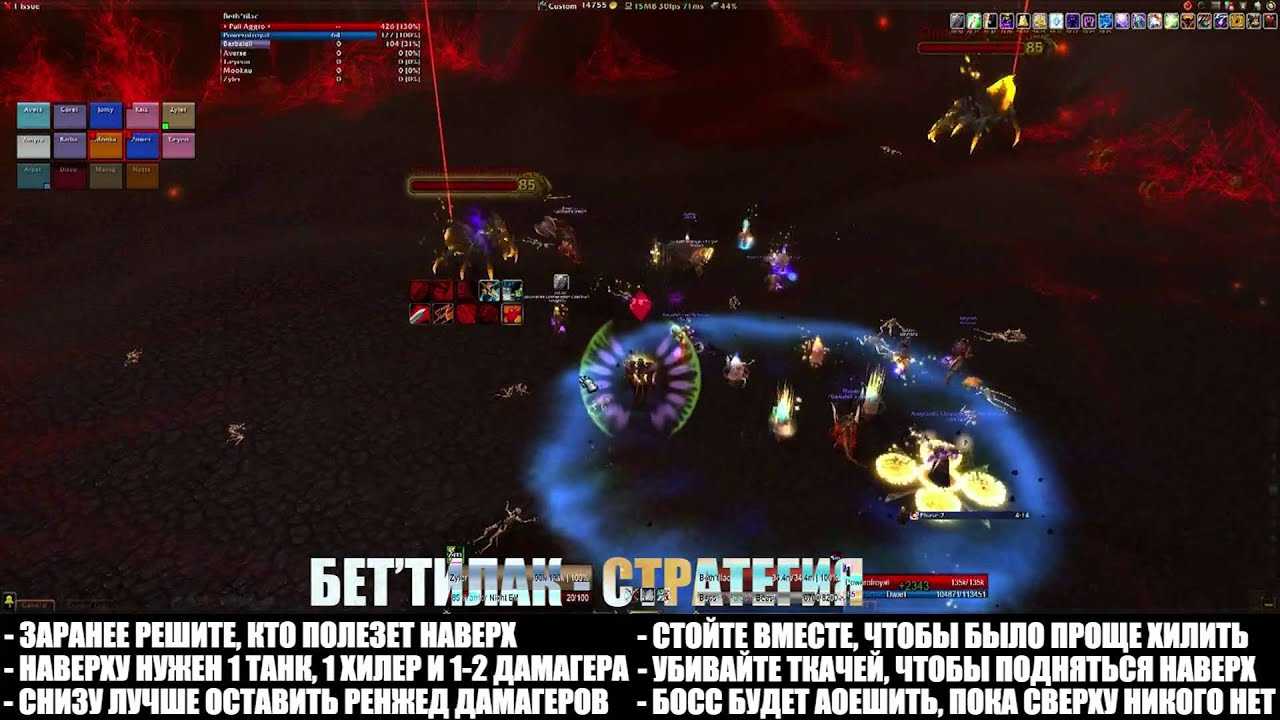
Перед пуллом нужно выделить группу из танка, хилера и одного-двух дамагеров — эти люди будут бить босса наверху паутины. Помните, что все время пока наверху никого нет, по рейду постоянно проходит сильное АоЕ. Это будет происходить и в самом начале боя, пока вы не убьете первых пеплопрядов-ткачей и пока означенная группа не залезет наверх по их паутине.
Идея здесь заключается в том, чтобы снести боссу как можно больше ХП до того как начнется 2-я фаза, но при этом распределить усилия так, чтобы группа внизу не захлебнулась в аддах. Группа наверху должна внимательного следить за метеорами (не попадать в них), и при касте Тлеющего разрушения спрыгнуть вниз через дыры от метеоров. После того как каст прошел, группа возвращается наверх.
Внизу рейду предстоит разбираться с тремя видами аддов:
- Паучки — их нужно заливать аое и не допускать к боссу/другим аддам, иначе те съедят паучков, отхилятся и баффнутся на дамаг. Других аддов надо держать в стороне от мест появления паучков.
- Трутни — танкуются, должны убивать до того как закончиться их энергия, иначе они высосут её у босса и ускорят наступление 2-й фазы.
- Ткачи — таунтятся танками для того, чтобы заставить их спуститься с паутины, и после этого убиваются.
При пулле ткачи убиваются первыми, без этого назначенная группа не сможет подняться наверх. В остальное время приоритет убийства аддов такой: паучки > трутни > ткачи.
2-я фаза
Бет’тилак спускается вниз, адды перестают появляться, но те что есть — остаются и их нужно добить
Крайне важно убить перед спуском босса всех маленьких паучков, иначе может случиться так, что босс спустится прямо на них и отхилится, сведя на нет весь дпс по боссу на 1-й фазе.. Танки будут меняться после получения дебаффа, причем танк с дебаффом должен держать дистанцию 10м от любого другого игрока.
В остальном фаза представляет собой чистый зерг — вы должны убить босса до того как урон по рейду станет неотхиливаемым из-за Бешенства
Все кд на дамаг, включая героизм/бл/таймварп должны использоваться здесь.
Под конец боя при необходимости следует устроить ротацию рейдовых защитных кд.
Танки будут меняться после получения дебаффа, причем танк с дебаффом должен держать дистанцию 10м от любого другого игрока.
В остальном фаза представляет собой чистый зерг — вы должны убить босса до того как урон по рейду станет неотхиливаемым из-за Бешенства. Все кд на дамаг, включая героизм/бл/таймварп должны использоваться здесь.
Под конец боя при необходимости следует устроить ротацию рейдовых защитных кд.
6.2. Strategy Changes
It must be noted that the only difference in strategy occurs during
Phase One, and only on the ground level. All other aspects of the encounter
remain the same (except that they will be more challenging to perform due to
the increased damage and health of the boss).
In order to better handle the heroic mode mechanics, we advise raids to
tank the Cinderweb Drones in the center of the fight area, and have
the entire raid in that area as well.
In terms of prioritising DPS on the ground level, your raid should aim
to kill Cinderweb Spinners and then Cinderweb Drones. Cinderweb Spiderlings
will be handled independently, as detailed below.
The main issues stem from Cinderweb Drones’ Fixate
and the new adds, the Engorged Broodlings.
When a Cinderweb Drone Fixates on a raid member, that raid member must
be prepared to face the drone away from the raid, and ensure that the
drone is kept away from any Cinderweb Spiderlings. The damage done by the
drone is reduced by 75%, so surviving it should be easy. After 10 seconds,
the drone will return to its main aggro target. Hunters can Feign Death
to get rid of the Fixate immediately.
The best way to handle both Cinderweb Spiderlings and
Engorged Broodlings is to have a specific ranged DPS player assigned
to the place from where these adds spawn (the dark cave-looking areas at
the side). There are 3 such places in both 10-man and 25-man difficulties,
though in 10-man difficulty, they only spawn from one place at a time (as
opposed to 25-man difficulty where they spawn from all 3 locations at the same time).
The assigned player will have to essentially block the
path of any Broodlings which are heading for the raid, while also trying to
kill the Spiderlings on his own.
We recommend that you assign Marksmanship Hunters, with for
the task. They are able to single-handedly kill (and permanently slow) the
Spiderlings, while having good mobility (due to Disengage) and
immunity against Volatile Burst (due to Deterrence).


It is more important than in normal mode to taunt down
Cinderweb Spinners, as their Fiery Web Spin ability, if not
interrupted, can cause major problems and most likely cause a wipe.
If these adds are taunted down and killed promptly, this should
not be an issue at all.
A note should be made regarding DPS balance on the ground level
versus Beth’tilac’s level. While the start of the fight is rather lenient
in terms of the DPS requirements for controlling the adds on the ground level,
this changes as the fight goes on. We recommend that, after the first
Smoldering Devastation, one (10-man) or two (25-man) DPS players from
Beth’tilac’s level remain on the ground level.
Phase Two, as mentioned, is identical to its normal mode counterpart, with
the exception of highly increased damage to the raid and tanks, and higher
boss health (resulting in a longer time spent in Phase Two, thus more stacks
of Frenzy).
This is a brutal gear check for both DPS players and healers, and proper
timing of healing and damage reduction cooldowns is a must.
7. Learning the Fight
Depending on your own raid DPS, you will want to have Beth’tilac around
80% health or lower by the start of Phase Two. Starting from this number, you
should use a few attempts to determine exactly how many (and which) players
should go up to Beth’tilac’s level to achieve this goal.
Balacing your DPS players accordingly is the most important aspect of this
fight, so do not hesitate to wipe several times to get it right. The rest
of your raid should make use of these attempts to better understand their
roles as well.
While healer balance should generally not be an issue (1 on the Beth’tilac
level in 10-man and 2 or 3 in 25-man), this is something you should also
experiment with.
8. Final Considerations
As you can see, the Beth’tilac encounter is one of add control and sheer
numbers, as having sufficient DPS and healing power is crucial to the
success of your raid. With proper execution, and a solid balance between your
two teams during Phase One, it should not prove to be a difficult fight at
all.
Навыки
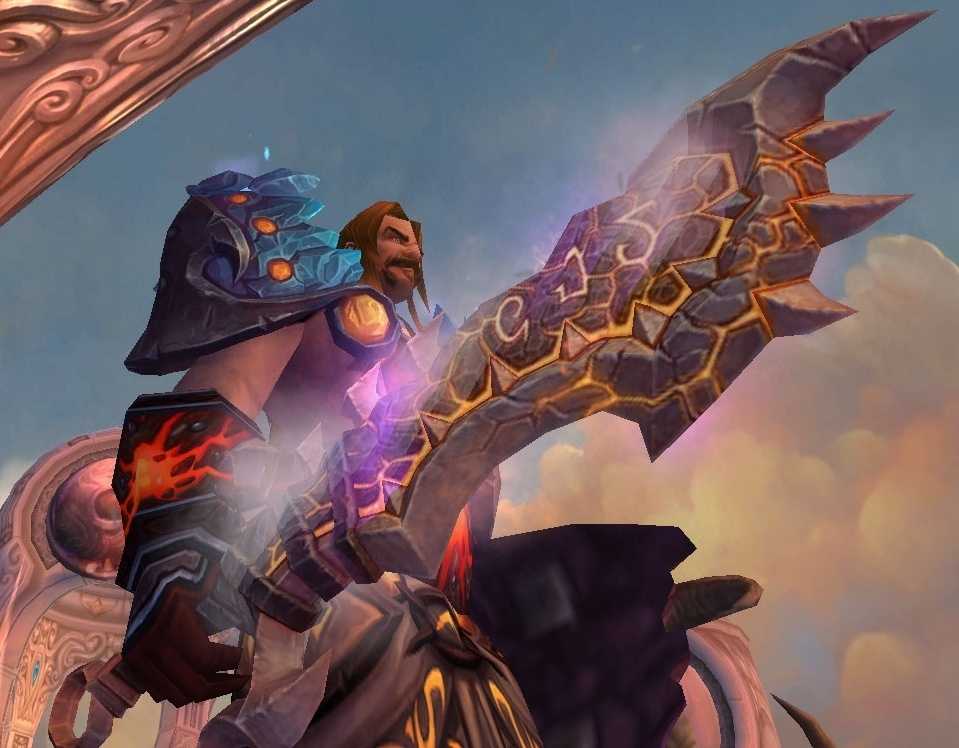
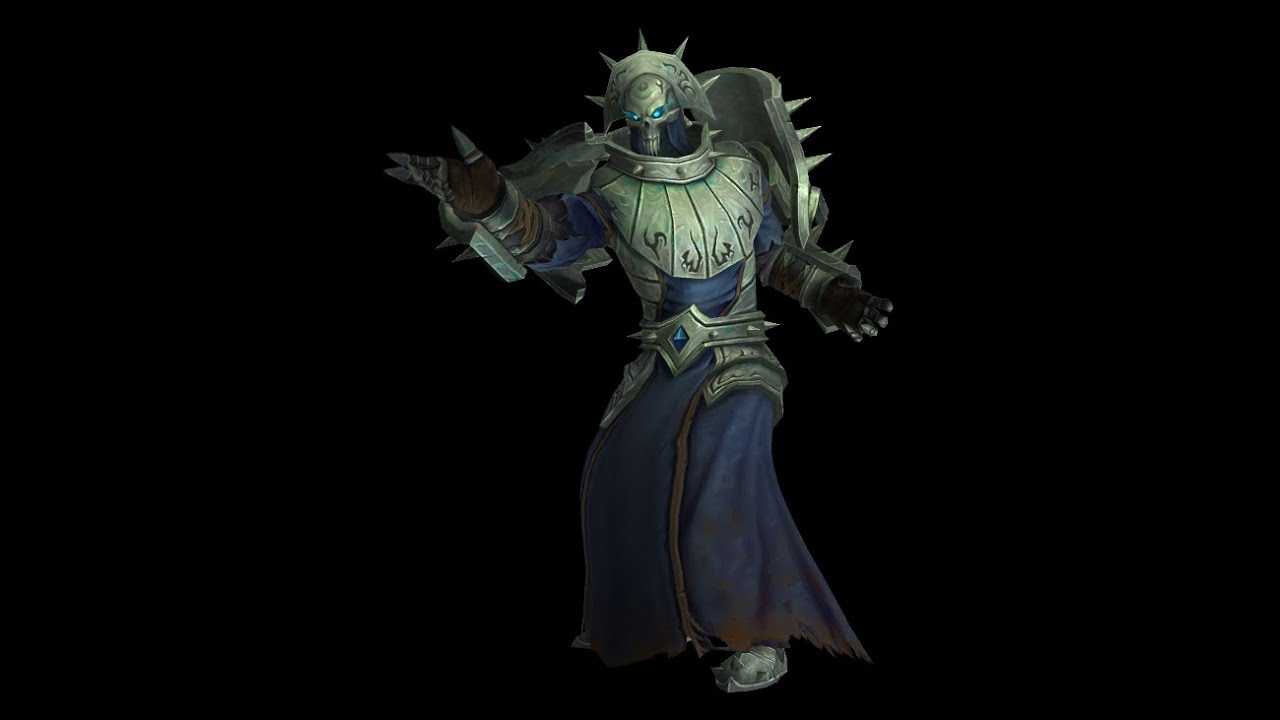
Бет’Тилак
Бет’тилак медленно теряет энергию огня по ходу боя. Дроны Пепельной Сети также истощают часть своей энергии, когда у них заканчивается энергия.
Когда у него заканчивается энергия, он вызывает дымное опустошение, посылая вокруг себя пламя.
Бет’тилак отступает к верху своей сетки в начале матча.
Фазы 2
После трехкратного выполнения тлеющего опустошения Бет’тилак впадает в безумие. Он снижает безопасность своей сети и больше не просит помощи у остальных пауков.
-
Безумие: Бет’ти лак периодически впадает в безумие, увеличивая свой урон на 10% до конца боя. Эффект суммируется.
Прядильщик Ashweb
Прядильщики Ashweb свешиваются на паутине нитей. Такие умения, как Taunt и Silars, заставляют их падать на землю. После снятия его нить все еще остается, позволяя игрокам забраться на вершину сетки.
Горящая кислота: Прядильщик Пепельной паутины выплевывает огненный яд в случайного игрока, нанося 26,740 XNUMX единиц урона от огня.
Дрон Ashweb
Эти большие пауки выходят из пещер под паутиной. Когда его энергия огня иссякнет, Дрон Пепельной паутины поднимется к Бет’тилак, чтобы вытянуть из нее энергию огня.
-
Кипящий всплеск: дрон Ashweb выплевывает горящее сусло с расстояния 500 метров под углом 60 градусов вперед, нанося 65,662 XNUMX единицы огненного урона врагу в этой области.
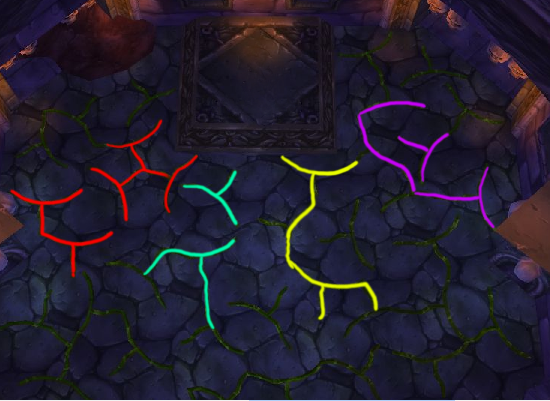
Эти маленькие пауки выходят из пещер под паутиной. Они инстинктивно двинутся к Дронам Пепельной Сети.
Водянистый кашель: Паук Пепельной Паутины прыгает на случайного игрока в пределах 5 метров, вводя в него яд и нанося 7,724 2 единиц огненного урона каждые 10 секунды в течение XNUMX секунд.
4.1. Abilities
During this phase, Beth’tilac will retain Ember Flare
(10-man/25-man), dealing damage to all enemies on the
ground level in the same way that she did during Phase One on her web.
In addition to this, she gains the following abilities:
-
Frenzy: a stacking buff which increases Beth’tilac’s damage
done by 5% per stack. A stack is added every 5 seconds. It acts as a soft
enrage timer and this is the reason you want to have the boss as low on health
as possible when entering this phase. -
The Widow’s Kiss: Beth’tilac places a debuff on the main aggro target,
lasting 20 seconds. For the duration of this debuff, the tank will gain a stack
of The Widow’s Kiss every two seconds, reducing healing taken by 10% per stack.
This effect will cease stacking (and disappear entirely) when the initial
debuff drops off, so after 20 seconds in total. In addition to this, the tank
affected by this debuff will deal damage to allies within 10 yards. -
Consume: this passive ability causes Beth’tilac to be healed
for 10% of her maximum health by consuming any Cinderweb Spiderlings that may
come in melee range of her.
5.2. Execution
The idea behind the execution of the achievement is to lower the
Cinderweb Drones to very low health, let them climb to Beth’tilac’s level
when their energy is depleted, and have the DPS up there kill them.
5.2.1. Phase One
For the ground level team, the fight changes little. DPS players (and the
tank(s)) will have to make sure that Cinderweb Drones do not die on
the ground level. This will complicate matters to an extent, since the Drone
will be alive for longer and more attention to Spiderlings will need to be
given. By being alive for longer, the Drone will also deal more damage to
the ground level players, through its two abilities: Burning Acid
(10-man/25-man) and Boiling Splatter
(10-man/25-man).
The Beth’tilac level team will have to switch from nuking Beth’tilac to
finishing off Drones which climb up to their level. Drones appear to climb
up in front of Beth’tilac, so melee DPS players may need to move. Drones
remain on Beth’tilac’s level for exactly 20 seconds, after which time they
descend, so players have 20 seconds to finish off Drones.
The faster the Drones die on Beth’tilac’s level, the less energy they will
siphon from her, and the longer Phase Two will be delayed. This enables your
raid to lower Beth’tilac’s health more, and make Phase Two easier, but also
allows more time for an extra Drone to spawn right before Phase Two, which
may mean your raid will need to tank two Drones during this phase.
If Drones are left to Siphon as much energy as possible from Beth’tilac
before being killed, this will speed up the end of Phase One, allowing for
fewer Drone spawns, possibly completely eliminating the final spawn. At the
same time, however, it means your raid will have done less damage to
Beth’tilac before Phase Two.
5.2.2. Phase Two
Regardless of how long your raid delays killing Drones on Beth’tilac’s
level, you will have to deal with at least one Drone during Phase Two. This
does not change the phase at all, however.


The only thing to keep in mind is that your tanks will also have to tank
the Drone(s) while tanking Beth’tilac. The tank currently not tanking the boss
should tank the Drone(s) and make sure that they are faced away from the
raid and the other tank, as their breath attack is highly damaging.
Healers should also expect extra damage from Burning Acid
(10-man/25-man) during this phase.
Lastly, it is imperative that any Drones which are alive when entering
Phase Two remain alive until Beth’tilac is defeated, as otherwise the
achievement will be failed.
The heroic mode of Beth’tilac is a true test of both your raid’s ability
as well as gear. It provides very tough challenges for both DPS players
and healers, and will require excellent execution to defeat.
6.1. Differences from Normal Mode
Before delving into the actual changes, it should be noted that all
abilities deal more damage in heroic mode, and Beth’tilac as well as all of
her adds have increased health. This will prove to be a brutal gear check
for your healers, as well as for your DPS who will find it very hard to kill
the boss before the soft enrage wipes the raid.
The changes from normal mode are:
-
Cinderweb Drones will occasionally Fixate on random
raid members (only those on the ground level are susceptible to this). This
causes the Drone to attack that target, ignoring any aggro, for 10 seconds.
During this time, the Drone deals 75% reduced damage. -
Cinderweb Spinners gain a new ability, Fiery Web Spin. If left
hanging from their web filaments, they will occasionally cast this ability
on random raid members, stunning them for 25 seconds. It is interruptible. - A new type of add, called Engorged Broodling, will spawn regularly
during the encounter. These adds fixate on random raid members and run to them
at a high speed. When coming in melee content with a player, they detonate
and explode for 42,500 Nature damage (Volatile Burst) in an 8 yard
radius. This also leaves a poison puddle on the ground (Volatile Poison)
which deals high nature damage to anyone standing in it (and also slows
their movement speed).
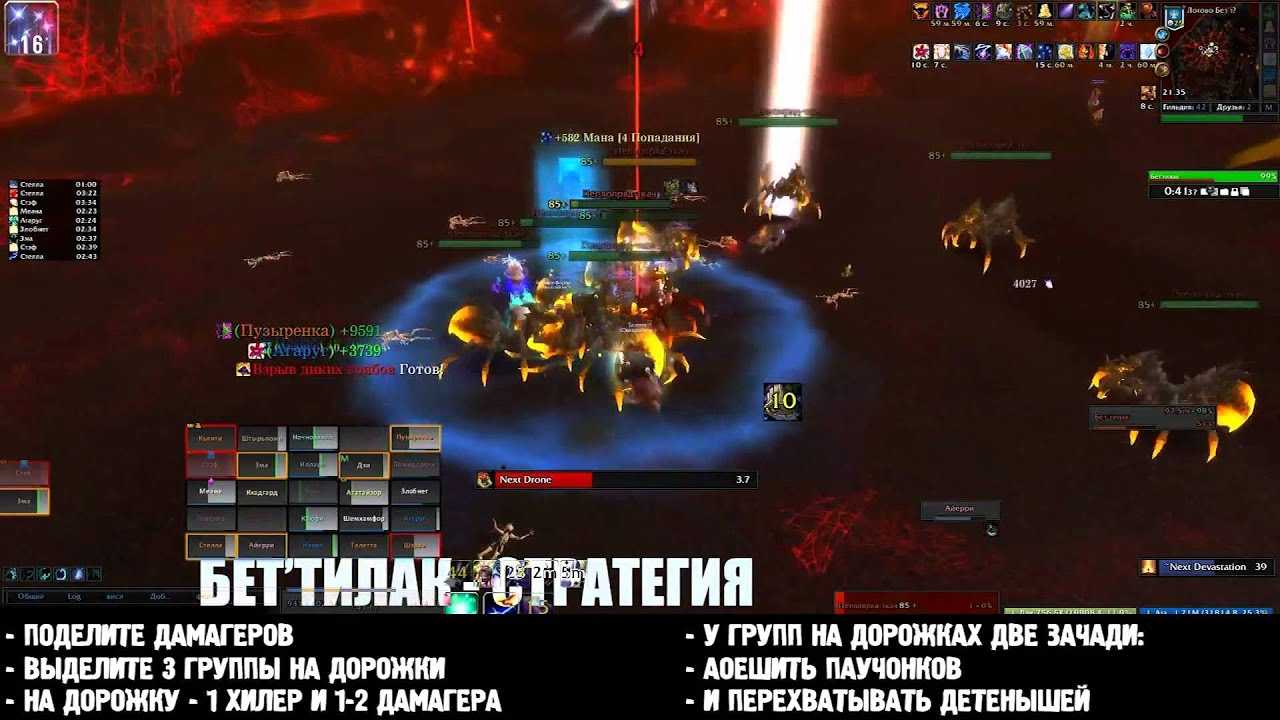
Ground team
The rest of the healers will be staying on the surface. You’ll want to put at least 1 (maybe 2 healers) on the tank down below as they’ll be manoeuvring the big spider ads. While the DPS players are busy AoEing the ads and switching back to the big spiders (Cinderweb Spiderlings) when there’s nothing to AoE, the healers will be spent handling residual AoE damage like Ember Flares as an example. Try to position yourself in a relatively centralized position so you can reach out and heal the players AoEing and the tanks.
Most importantly, do not stand in front of the bigger spiders.
Final phase
Happens after the third smoldering devastation. Definitely layer your defensive cooldowns. Totems, Hymns, Barriers, whatever you have, just use the works. Your raid should be stacked up neatly directly behind the boss. It takes some time before the soft enrage catches up and the damage essentially becomes unhealable. Frenzy increases Beth’tilac damage by 5%.
If you’re on tank healing, pay strict attention to which tank has Beth’tilac. The tanks will be switching every 20 seconds to avoid the Widow’s Kiss.
Cooldown rotation
Here’s an example of how I intend to stack the raid cooldowns we have after we enter the last phase. Feel free to modify the order or number of cooldowns at your own discretion. Once the boss has 10 stacks of Frenzy, I’ll be calling for these one after the other. With Heroism used immediately, that grants the healers the additional haste to maintain raid health before Frenzy gets difficult to get through.
Power Word: BarrierSpirit Link Totem ATranquilityDivine Hymn ADivine Hymn BSpirit Link Totem B
Debuffs to add
Priests
Keep Fade handy. With the amount of ads going around, you’re bound to attract some attention. If you’re up top, be aware of the players around you. Bonus points if you pull off a Life Grip on a player just before Smoldering Devastation hits.
Shamans
Your Telluric Currents targets will be the big spiders on the bottom if you can afford to do any damage at all. Drop a Mana Tide totem while the first or second Smoldering Devastation is going on.
Druids
I never tried Beth’tilac with any Druids so I never got a chance to see if they did anything special.
Paladins
I’m not sure if the mini-spiders are stunnable, but if you see a small spider bolting for the bigger spiders, try stunning it with a hammer.
1.4. Loot
- Robes of Smoldering Devastation (heroic: Robes of Smoldering Devastation), Cloth Chest
- Cowl of the Clicking Menace (heroic: Cowl of the Clicking Menace), Balance/Restoration Druid Head
- Cindersilk Gloves (heroic: Cindersilk Gloves), Balance/Restoration Druid Hands
- Cinderweb Leggings (heroic: Cinderweb Leggings), Leather Agility Legs
- Flickering Shoulders (heroic: Flickering Shoulders), Mail Random Shoulders
- Thoracic Flame Kilt (heroic: Thoracic Flame Kilt), Elemental/Restoration Shaman
- Spaulders of Manifold Eyes (heroic: Spaulders of Manifold Eyes), Holy Paladin Shoulders
- Carapace of Imbibed Flame (heroic: Carapace of Imbibed Flame), Tanking Chest
- Arachnaflame Treads (heroic: Arachnaflame Treads), Plate Feet
- Widow’s Kiss (heroic: Widow’s Kiss), Agility Ring
- Spidersilk Spindle (heroic: Spidersilk Spindle), Tanking Trinket
- Funeral Pyre (heroic: Funeral Pyre), Caster Staff
- Mandible of Beth’tilac (heroic: Mandible of Beth’tilac), Tanking One-Handed Sword
- Ward of the Red Widow (heroic: Ward of the Red Widow), Healing Shield
- Rare Boss Drops:
- Eye of Purification (heroic: Eye of Purification), Healing Axe
- Smoldering Censer of Purity (heroic: Smoldering Censer of Purity), Healing Staff
- Firethorn Mindslicer (heroic: Firethorn Mindslicer), DPS Caster Sword
- Entrail Disgorger (heroic: Entrail Disgorger), 1.4 Speed Agility Dagger
- Avool’s Incendiary Shanker (heroic: Avool’s Incendiary Shanker), 1.8 Speed Agility Dagger
- Shatterskull Bonecrusher (heroic: Shatterskull Bonecrusher), Agility Mace
- Zoid’s Firelit Greatsword (heroic: Zoid’s Firelit Greatsword), Strength Two-handed Sword
2. Overview of the Fight
Beth’tilac is a fiery spider which uses a variety of adds to attack your
raid. The encounter is split into two phases, henceforth referred to as Phase
One and Phase Two. The area where you fight Beth’tilac is divided into two
levels by a web which forms the ceiling of the room.
During Phase One, the boss will be stationary on top of her web
(the «Beth’tilac level»), where a few of your raid members will need to climb
up to and deal damage to her. In the meantime, down below
(the «ground level»), the rest of your raid will have to defeat three types of
adds: Cinderweb Drones, Cinderweb Spinners and
Cinderweb Spiderlings.
After Beth’tilac uses Smoldering Devastation (an ability which will
be explained below) three times, she will enter Phase Two, lowering herself
to the ground level where your entire raid can engage her. This phase is
essentially a burn phase where you raid will have to contend with a soft
enrage mechanic.
3. Phase One
Before starting the encounter, you will notice Beth’tilac dangling from a
web that acts as a ceiling to the room. Upon attacking her, she will quickly
retreat up onto her web, while Cinderweb Spinners will lower themselves
to your raid by use of web filaments. In addition to this, your raid will be
faced with two other types of adds: Cinderweb Drones and
Cinderweb Spiderlings, which enter the fight from the edges of the
encounter area, on the ground level.
Your goal during this phase is to send a small contingent of players to
damage Beth’tilac atop her web, while the rest of your raid handles the
adds.
In order for your raid members to reach Beth’tilac, you will need to make
use of the web filaments left behind after Cinderweb Spinners are killed.
These can be mounted like any vehicle, and will each transport one player to
Beth’tilac’s level.
Стратегия
Бет’тилак считается начальным боссом в Огненных Просторах и поэтому представляет собой относительно простой бой. Имейте в виду, что эта стратегия была создана на основе данных общедоступных тестовых областей, поэтому вполне вероятно, что некоторые вещи изменятся.
Фазы 1
На первом этапе нам придется разделить группу на две группы. Некоторые из них подключаются к сети, а другие остаются отключенными. Группы должны быть сбалансированы, так как обеим потребуются танк, ДПС и лекари.
В начале боя Бет’тилак поднимется на вершину своей сети, и если никто не последует за ней и не будет сопровождать ее, она начнет бесконтрольно атаковать группу.
Поднимаясь к сети
Чтобы попасть в сеть необходимо убить свисающего с сети ткача пепла Хиладорес. Их может сбить любой навык, и у них очень низкое здоровье (310,000 XNUMX очков здоровья). После смерти вы можете использовать Нить, чтобы подняться, но только одна прядь на человека.
На полу
Чтобы избежать этого, игроки должны убить пауков, как только они появятся. Морозная ловушка и умения в области творит с ними чудеса.


На этом этапе рекомендуется использовать Героизм / Кровожадность / Искажение времени, чтобы положить конец как можно скорее, до того, как Безумие закончится с вами.
Web team
Once your raid takes down Cinderweb spinners, a platform is free allowing players to jump onto it which lifts them up above the web. Send your tank up first. They need to survive long enough until a healer gets up top on the second platform. Any short defensive cooldowns should be used. Park 1 healer on the tank, 1 healer on the DPS. There should be enough cross healing going on to sustain everyone.
Watch for meteors and avoid them. They’ll burn a hole through the webbing. Pay close attention to the energy remaining on Beth’tilac. Once it reaches 0, she’ll activate her Smoldering Devastation which deals ~400000 damage to everyone close.
I plan to send up a Holy Priest (me) and a Holy Paladin. If that isn’t enough, I’ll yank up a Shaman as well.
5.1. Introduction
The concept behind this achievement is simple. It requires your raid to
only kill Cinderweb Drones while they are on the Beth’tilac level, and
never when they are on the ground level, and then defeat Beth’tilac in the
same attempt.
Essentially, your raid will need to tank and DPS the Drones, on the ground
level, until their energy bar is fully depleted. At this point, the Drones
should be very low on health, but not dead. After they climb up to Beth’tilac
to siphon her energy, players on the Beth’tilac level should kill the
Drones.
The execution of the achievement is slightly more complicated than the
idea, though, because of the way that the spawn times of the Drones line up
with the Smoldering Devastation casts and the end of Phase One. It is
likely that you will enter Phase Two with at least one Drone alive, which
will make tank healing even more difficult.
Добыча[]
| Предмет | Тип | |
|---|---|---|
| Обычный | Героический | |
| Страж Красной Вдовы | Страж Красной Вдовы | Щит Дух |
| Погребальный костер | Погребальный костер | посох Кастер |
| Жвало Бет’тилак | Жвало Бет’тилак | Одноручный меч Танк |
| Одеяния тлеющего опустошения | Одеяния тлеющего опустошения | Грудь Ткань Кастер |
| Перчатки из пепелошелка | Перчатки из пепелошелка | Перчатки Кожа Дух |
| Клобук явной угрозы | Клобук явной угрозы | Шлем Ткань Дух |
| Поножи из пеплопряжи | Поножи из пеплопряжи | Штаны Кожа Ловкость |
| Килт торакального пламени | Килт торакального пламени | Штаны Кольчуга Дух |
| Мерцающие наплечники | Мерцающие наплечники | Плечи Кольчуга Случайное зачаровывание |
| Ботфорты арахнопламени | Ботфорты арахнопламени | Ступни Латы ДД |
| Панцирь поглощенного пламени | Панцирь поглощенного пламени | Грудь Латы Танк |
| Наплеч множества глаз | Наплеч множества глаз | Плечи Латы Дух |
| Веретено паучьего шелка | Веретено паучьего шелка | Аксессуар Танк |
| Поцелуй Вдовы | Поцелуй Вдовы | Кольцо Ловкость |
| Извечный уголь | Предмет для задания | |
| Живой огонь | Хозяйственные товары | |
| Кристаллизованный кремень | Валюта |
4.2. Strategy
This is a standard burn phase. You will want to make sure that any
Cinderweb Spiderlings are dead when Beth’tilac descends, or she will
quickly heal up and you will indeed wipe to the enrage mechanic. No adds will
spawn during Phase Two, so you should only ever have to concern yourself with
Beth’tilac herself. Should any Cinderweb Spinners or Cinderweb Drones
still be alive at the start of Phase Two, your DPS should kill them off first,
before switching to Beth’tilac.
There is no impediment for your raid stacking up in one location (to make
healing easier), so you should do so. One tank should be in
front of Beth’tilac, on the opposite side of the raid, while the other tank
should be at the side of the boss. Below, we illustrate an example of raid
and tank positioning.

When a tank becomes affected by The Widow’s Kiss, the other tank should
taunt Beth’tilac, and this rotation should continue until the end of the
fight. Due to the positions mentioned above, no one should ever be damaged by
the AoE from The Widow’s Kiss.
Healers will have to contend with increasingly high raid damage, caused by
Ember Flare (10-man/25-man). Towards the end of the
fight, when stacks of Frenzy are high on Beth’tilac, raid cooldowns
should be alternated, such as Aura Mastery, Divine Guardian and
Power Word: Barrier.
This is the ideal time to use Bloodlust, Heroism or
Time Warp.
5. Achievement: Death from Above
The achievement Death from Above is part of the
Glory of the Firelands Raider meta-achievement and is a requirement for
obtaining the Corrupted Egg of Millagazor mount.
1.1. Health Pools
Beth’tilac has the following health pool:
- in 10-man normal difficulty: 17.8M;
- in 10-man heroic difficulty: 27.9M;
- in 25-man normal difficulty: 53.1M;
- in 25-man heroic difficulty: 83.7M
Alongside Beth’tilac, your raid will face three types of adds. Their health
pools are as follows:
- in normal mode, Cinderweb Drones have 1.7M health in 10-man difficulty and 5M health in 25-man difficulty.
- in heroic mode, Cinderweb Drones have 2.3M health in 10-man difficulty
and 6.9M health in 25-man difficulty. - in normal mode, Cinderweb Spinners have 178k health in 10-man
difficulty and 176k health in 25-man difficulty. - in heroic mode, Cinderweb Spinners have 236k health in 10-man
difficulty and 237k health in 25-man difficulty. - in normal mode, Cinderweb Spiderlings have 59k health in 10-man
difficulty and 76k health in 25-man difficulty. - in heroic mode, Cinderweb Spiderlings have 88k health in 10-man
difficulty and 106k health in 25-man difficulty.
Heroic mode presents a fourth type of add, called Engorged Broodling.
It has 190k health in 10-man difficulty and 574k health in 25-man
difficulty.